Properly Spicy Gingerbread Cats Recipe
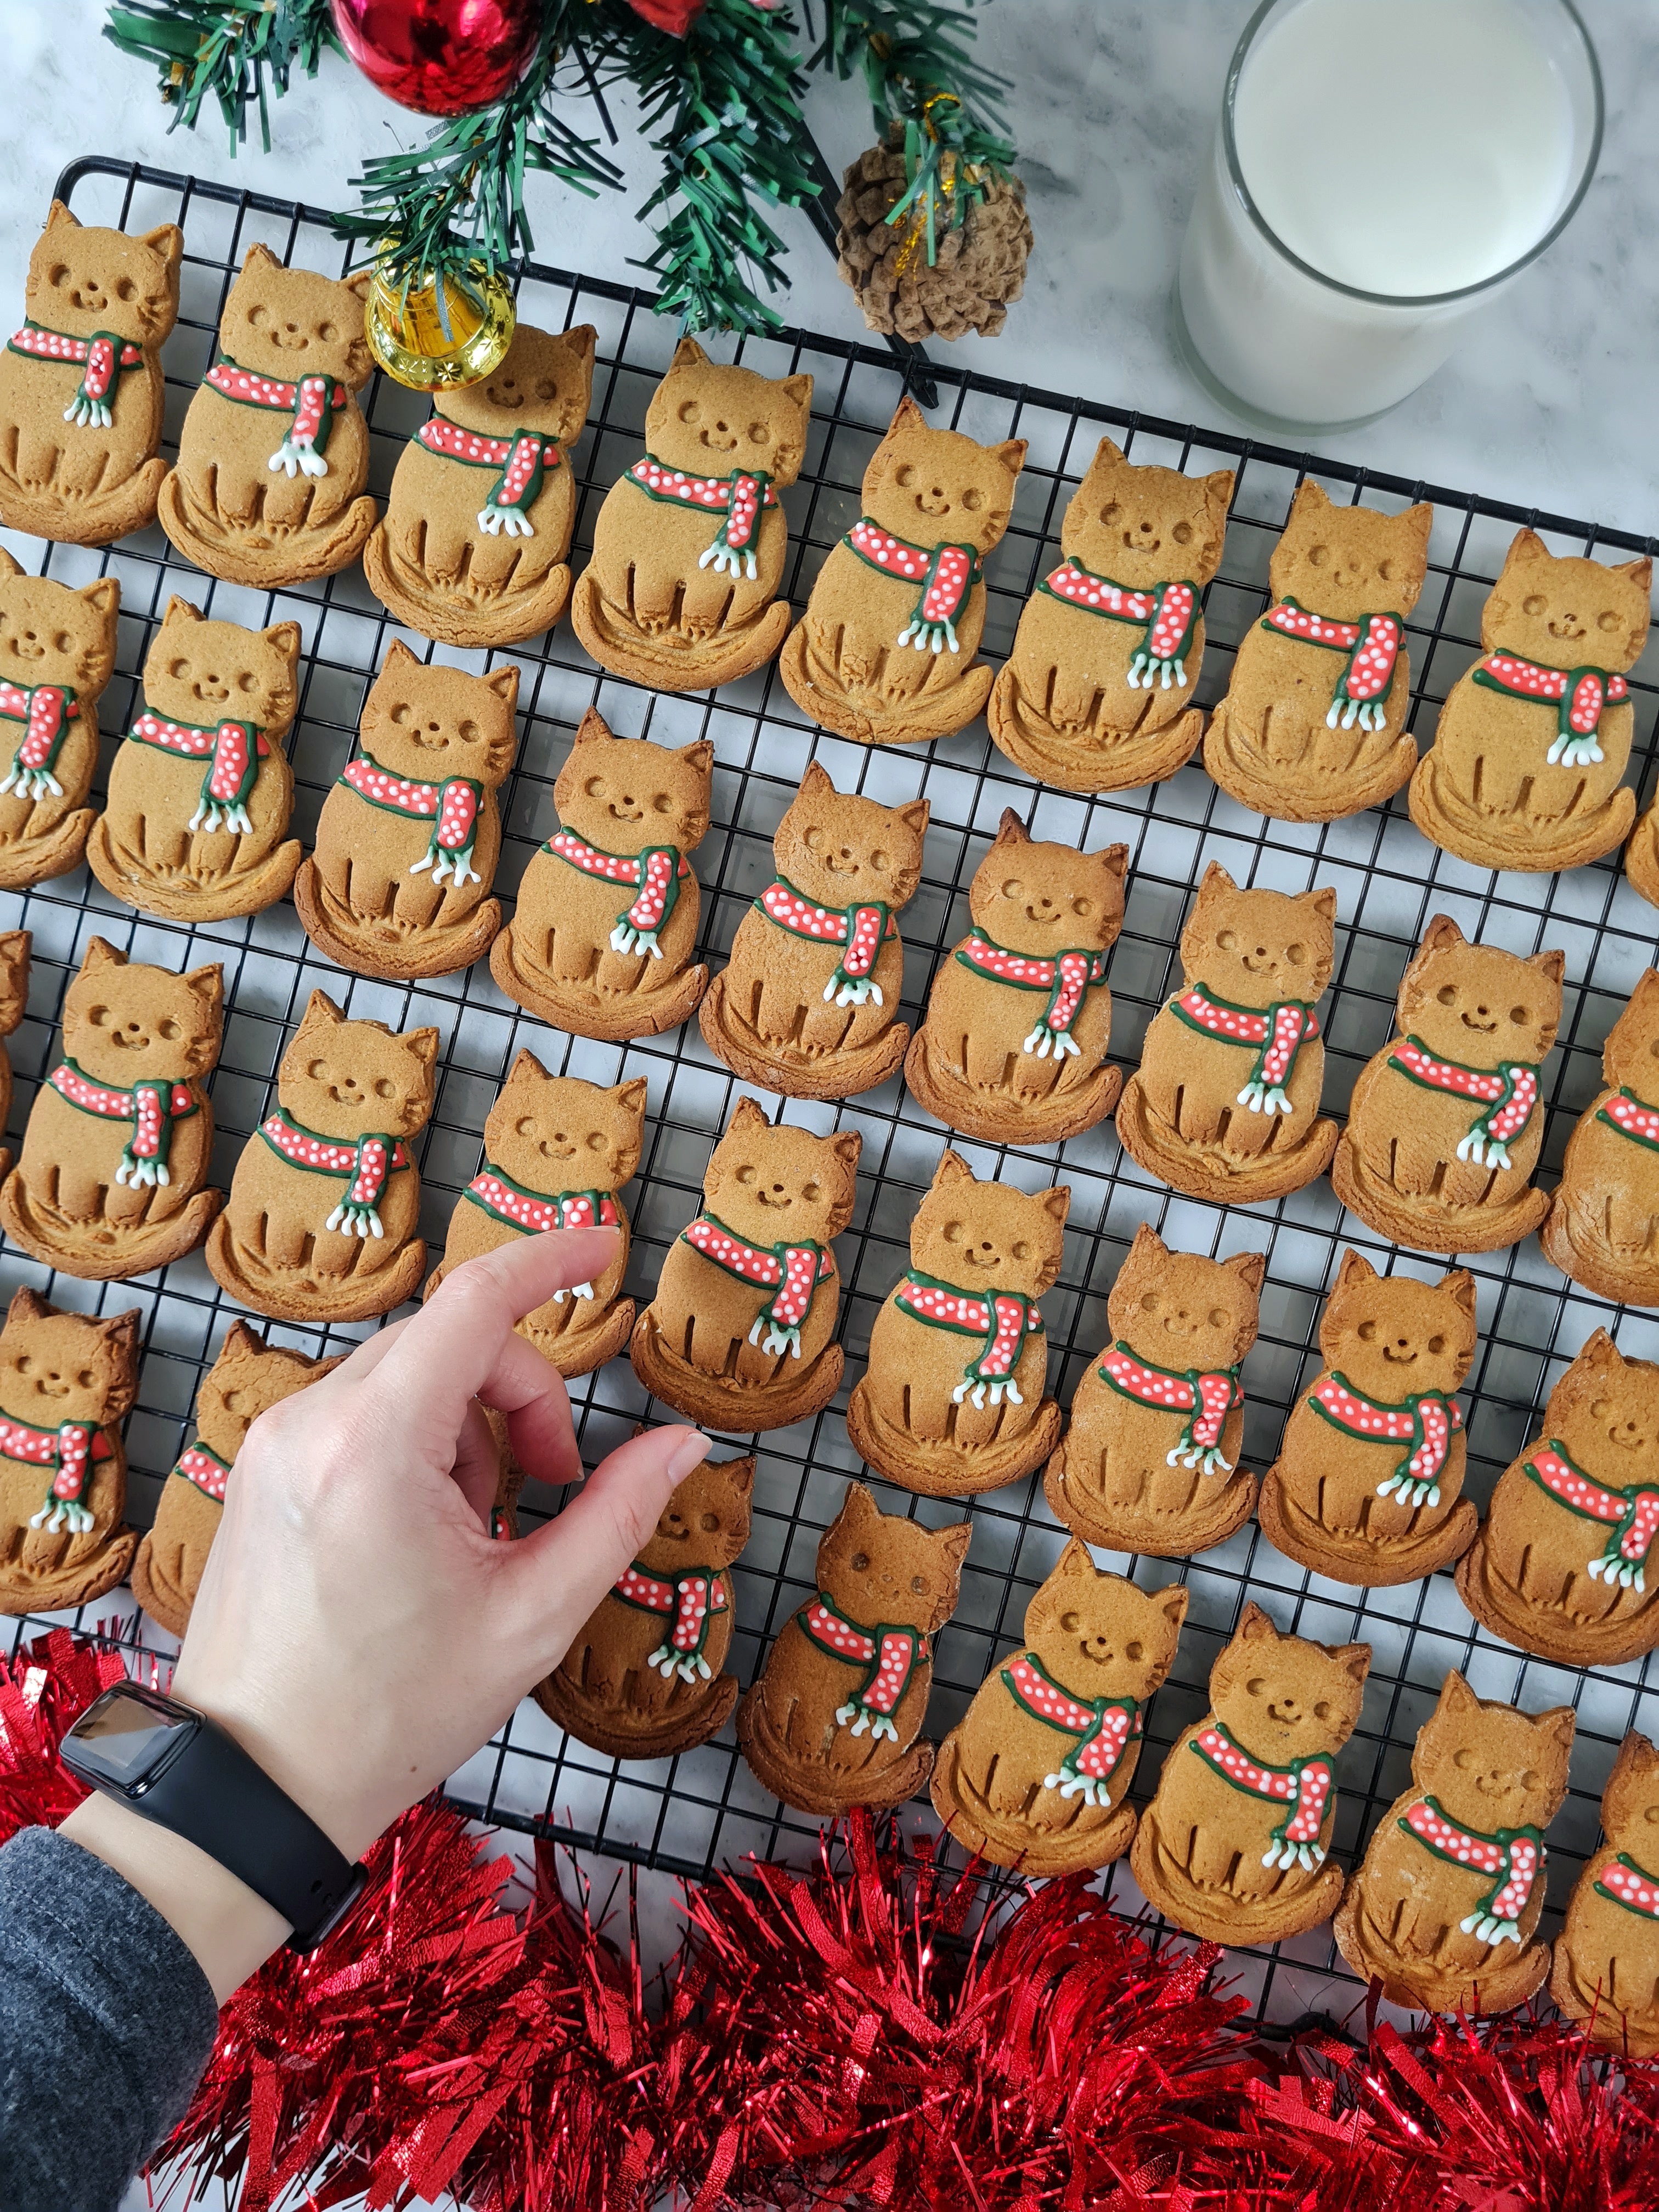
This year I made gingerbread cats with polka dot scarves, using a properly spicy gingerbread dough. And for properly spicy gingerbread, you're going to need some properly spicy spices.
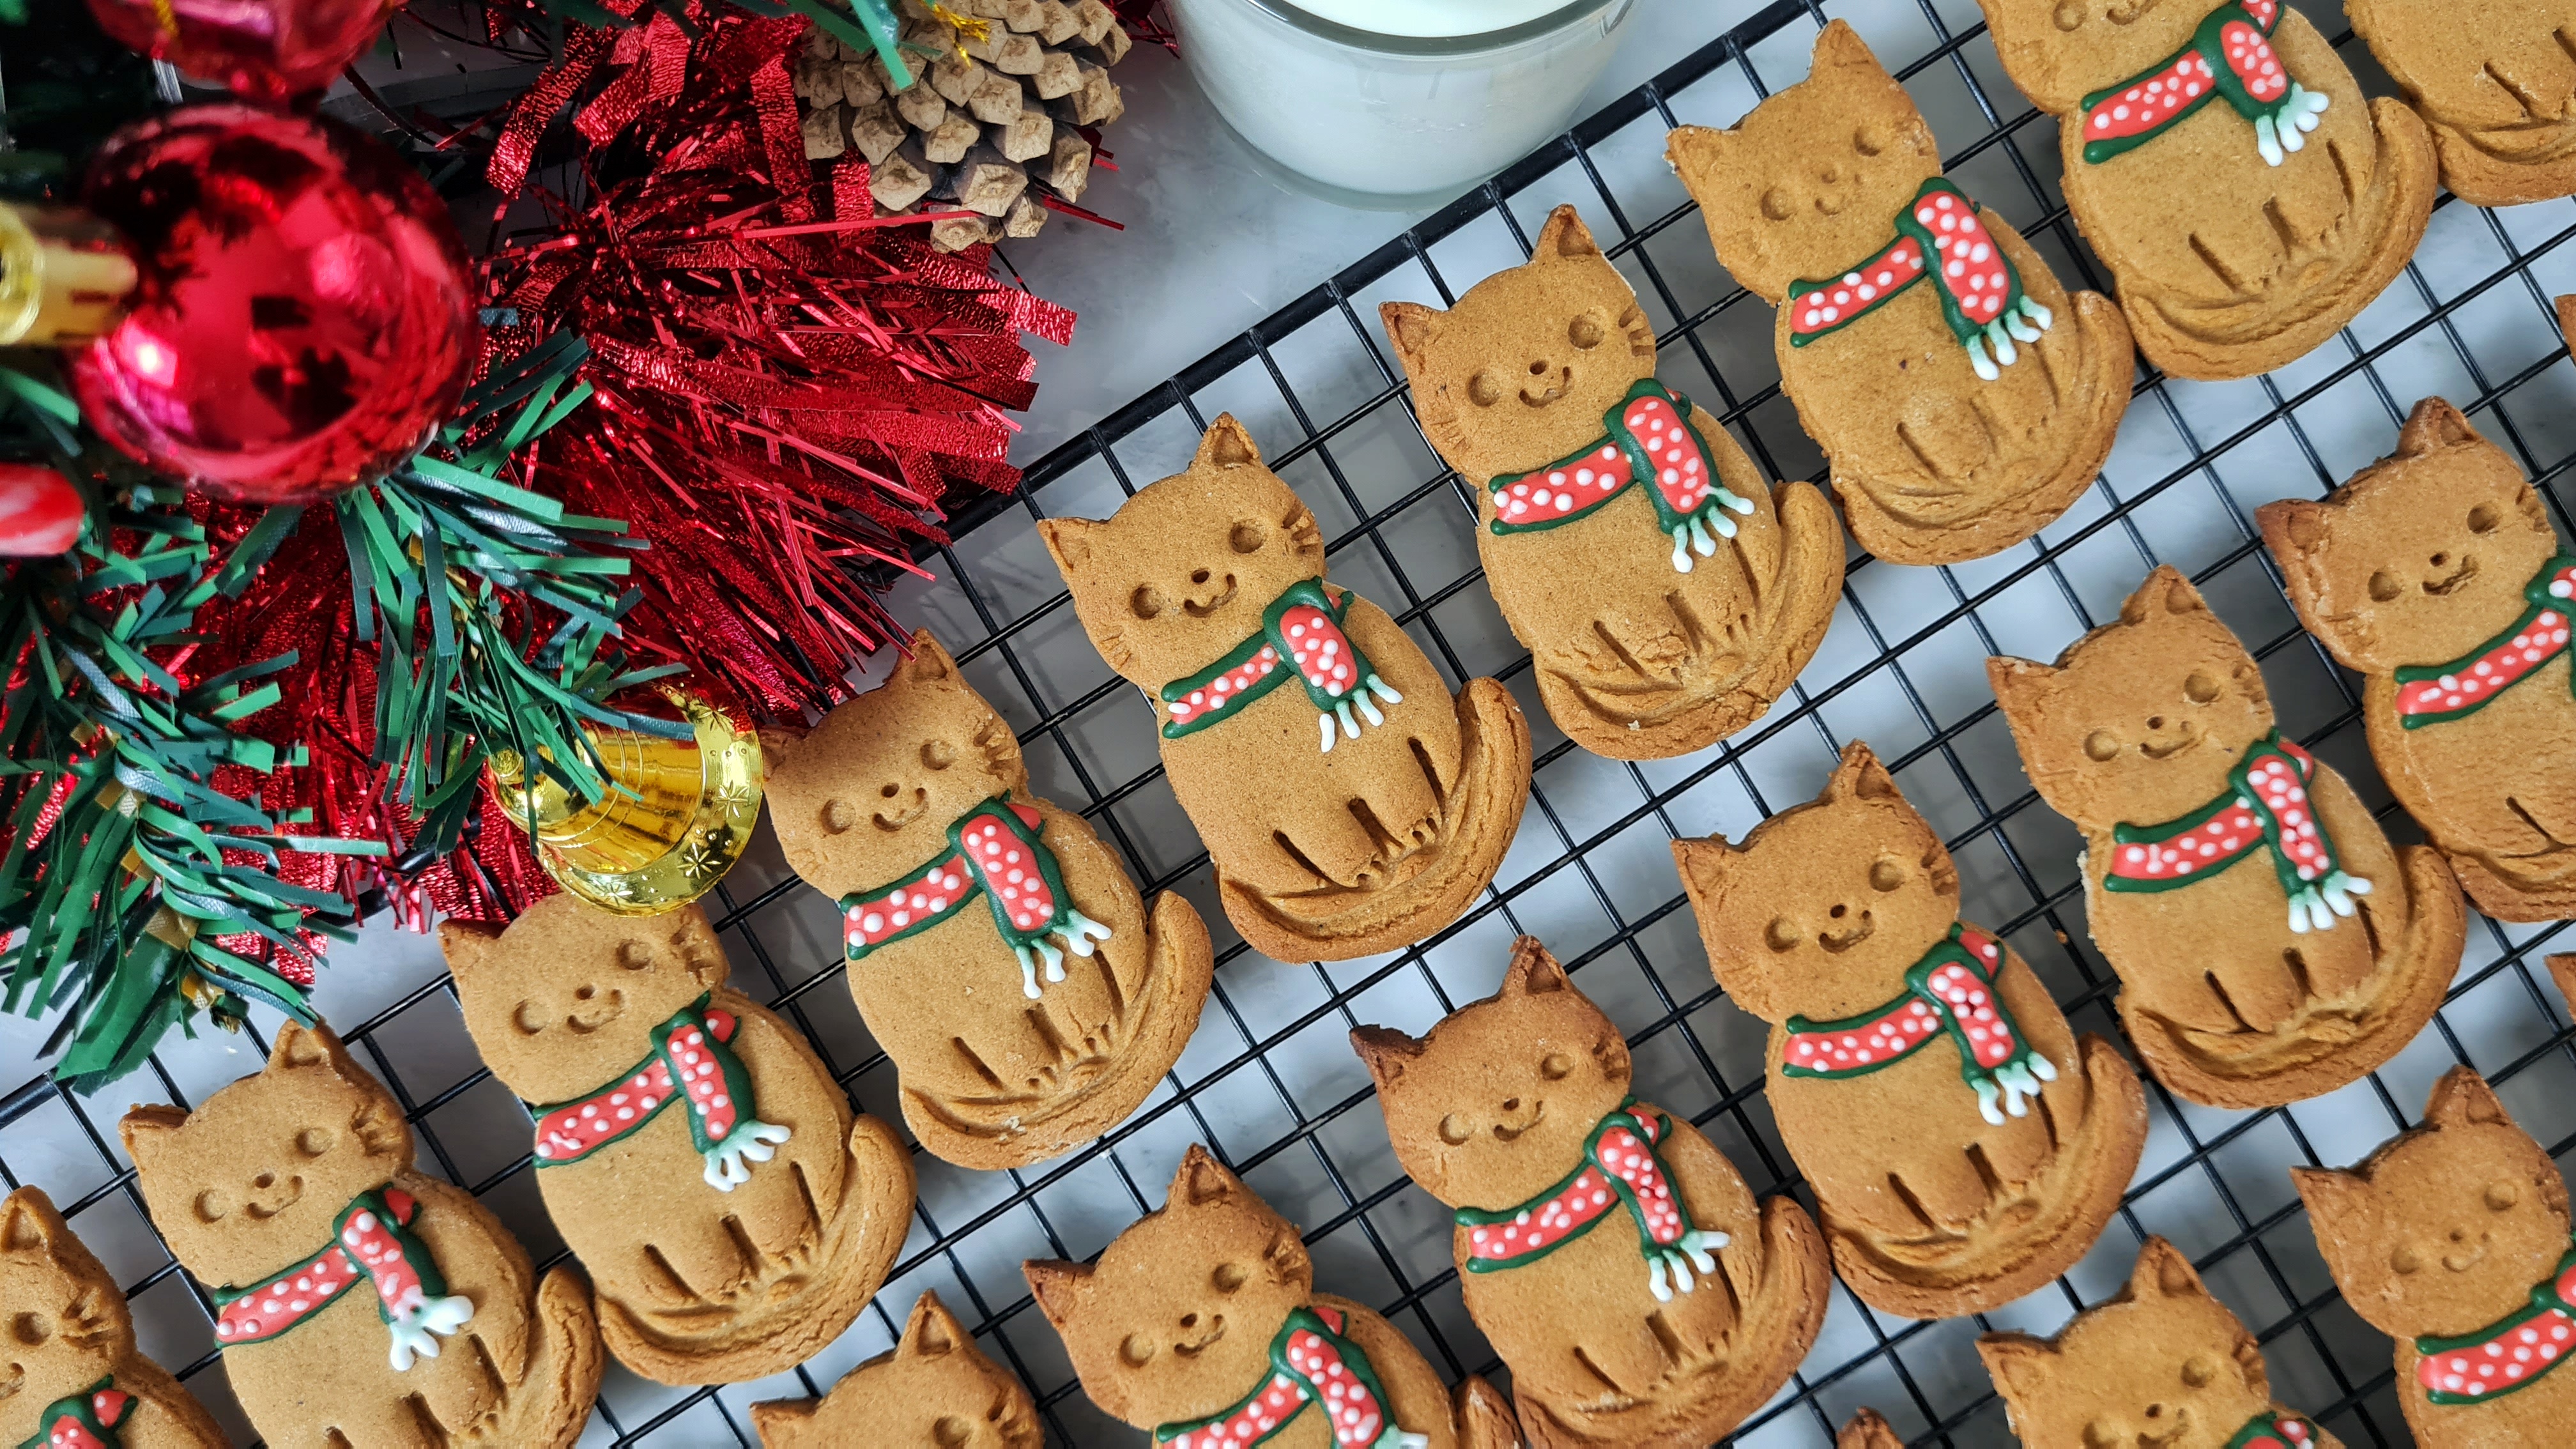
The last time I made gingerbread biscuits, I made these little men with Fair Isle jumpers. But having found a super cute cat biscuit cutter on eBay, I knew I had to make gingerbread cats this year. And to make them more Christmassy, I gave them little royal icing scarves.
The not-so-secret ingredient to my spicy gingerbread is freshly-ground black pepper. It gives the biscuits even more of a kick and zing. I got the idea from German Pfeffernusse – soft, spicy chunky cookies flavoured with black pepper as their name suggests.
My cookies are of the crisp, crunchy variety – although if you leave them out for a day they become soft and chewy. I personally like them both ways.
You can also watch me make these on my YouTube channel:
Ready? Let's go.
(Made exactly 42 biscuits with my cat biscuits cutter.)
Ingredients for Gingerbread:
100g unsalted butter, softened
100g soft brown sugar
65ml golden syrup
60ml black treacle
1 egg yolk (keep the egg white for the royal icing)
1/2 tsp freshly-ground black pepper
1/2 tsp ground cinnamon
1 heaped teaspoon ground ginger
1/2 teaspoon ground nutmeg
1/4 tsp ground cloves
Pinch of salt
350g plain flour
1 tsp baking powder
Extra flour for rolling
Ingredients for Royal Icing:
1 egg white
1 tsp water (optional)
200g icing sugar
Paste or gel food colouring
Method:
1. Preheat the oven to 180°C and line a couple of baking sheets with non-stick baking parchment.
2. Cream the butter, sugar, syrups and egg yolk together in a large bowl. Stir in the spices and salt, then the flour and baking powder, kneading until you have a smooth dough.
3. Roll out the dough until about 4mm thick, and cut out the shapes you like. Arrange them on your baking trays, leaving just 1–2cm space in between them (they don't spread much). Bake for 10–12 minutes, and leave them to cool completely.
4. To make the royal icing, whisk the egg white until it forms soft peaks, and beat in the icing sugar. It should be thick enough to leave 'ribbons' when you lift the beater and leave trails of icing on the surface, but thin enough for those ribbons to sink back down after a few seconds. If it's too thick, add a little water bit by bit.
5. Divide the icing into bowls and colour them as you like (I coloured two batches green and red respectively, and left one batch colourless/white). Place in piping bags with either narrow piping tips, or with just the tip of the piping bag cut off so you can 'draw' with the icing.
6. To make 3D scarves, Pipe the horizontal part of the scarf around the cats' necks first, letting them dry a little: do the outline first, then fill in with another colour, then dot the poladots on in the last colour. Once that part's dry, pipe the vertical 'hanging' part of the scarf, also adding tassles at the bottom if you like.
7. Leave the icing to dry completely before serving – store the biscuits in an airtight container to keep them crunchy for longer.
Enjoy, and have a very merry Christmas and happy New Year.
Hi! :-) Can you be so kind to let me know how to buy one of those kitty biscuit cutters? I know you are probably very busy, but i've been looking on eBay, and there are so many different ones but I think the one you've found is the cutest! Please, let me know a name or exact title, or a link, i'm invited to a Christmas Party & those gingerbread kittiens are the cutest! Thank you so very much! from Patti Morey, of Ashland Oregon, sawthecomet@gmail.com
ReplyDelete